Sensitive Configuration (secrets)
Sensitive Configuration
Sensitive configuration, i.e. secrets, can be configured in GitHub, and passed to the applications as Environment Variables via the P2P pipeline.
You will need to be in the admin role for the application’s repository to be able to configure variables and secrets. This will automatically be the case for any repository you have created via corectl app create.
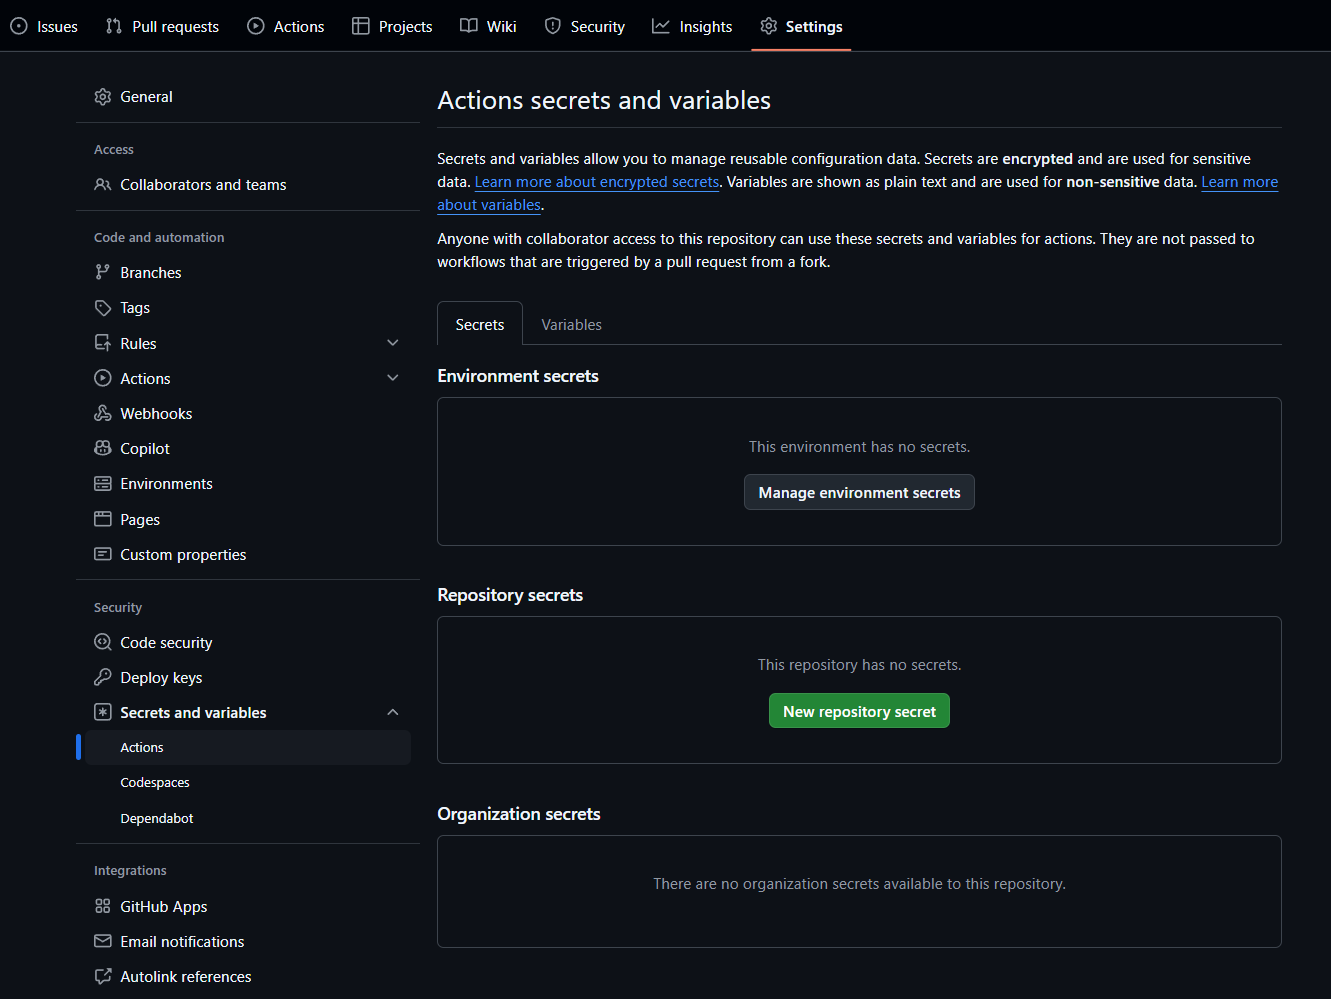
Secrets can be managed in the Settings tab on a repository, by navigating to: Settings > Secrets and variables > Actions.
Common Sensitive Configuration
On the repo for the application, navigate to: Settings > Secrets and variables > Actions and then the Secrets tab. Under Repository secrets click New repository secret. N.B. Unlike variables, secret values cannot viewed in the GitHub UI or logs.
In this example below we’ll make a secret called: GLOBAL_SECRET with a value of GLOBAL_PASSWORD-123
Environment Specific Sensitive Configuration
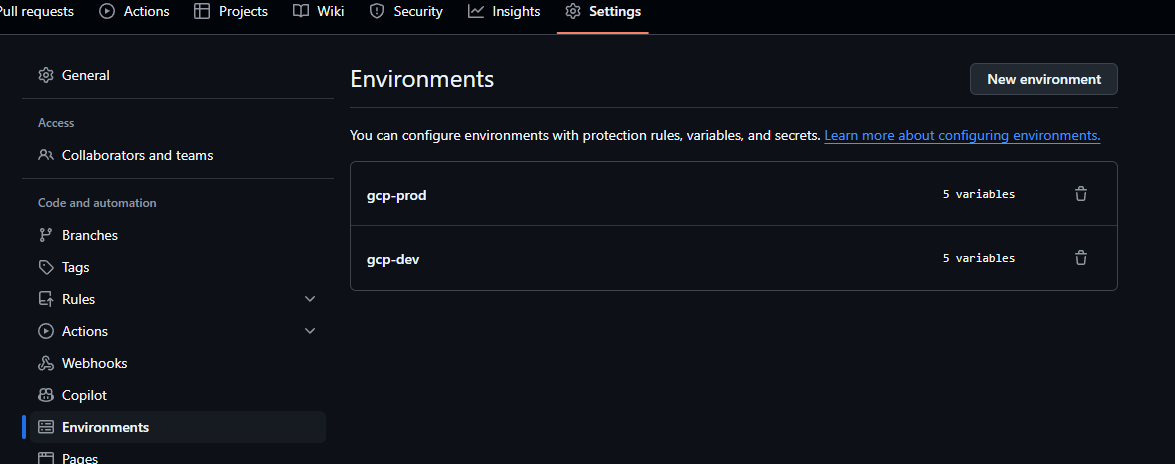
Environment specific secrets can be configured in GitHub via Settings > Environments, then choosing the correct platform environment.
If you need further isolation (e.g. different setup for Functional vs NFT test environments) that’s possible by configuring the secrets in dev and then only passing in specific variables to each Makefile target (covered below).
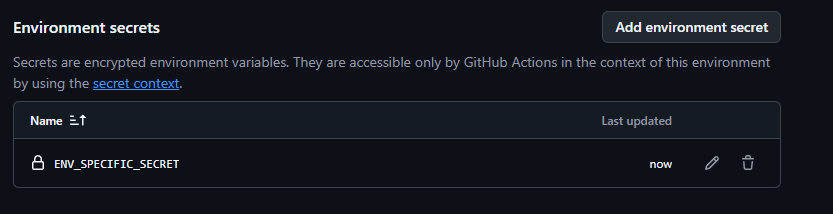
Environment specific secrets can be configured via Settings > Environments, then choosing an environment, and clicking Add environment secrets.
In this example below let’s add a secret called ENV_SPECIFIC_SECRET with a value of GCP-DEV-PASSWORD-123.
Full example
As per the above we’ll add both a common and environment specific secret in this example.
The above steps the secrets in to GitHub actions, but because we use re-usable workflows in GitHub actions additional steps are necessary to explicitly pass them through to the execution context that invokes the Makefile, and then changes are necessary in the Makefile to pass environment variables through to the application itself.
Updating the P2P workflow
Let’s say we want to pass our above example variables and secrets into the application running in the integration environment. As the integration test step is past of the fast feedback pipeline we’ll need to update the fast-feedback.yaml workflow (this lives in .github/workflows in the root of the repository)
To simplify the passing of variables and secrets to an application we can use a special variable called ENV_VARS. The platform P2P will automatically take everything that is configured in ENV_VARS and pass that in as environment variables, ENV_VARS expects to be a multi-line variable of the form KEY=VALUE on each line.
In GitHub workflows, secrets can be referred to via ${{ secrets.NAME }} and in yaml a multi-line variable is denoted via a | character.
So to pass in all of the above example variables into the P2P we’d modify the application’s fast-feedback yaml to add a secrets: block that defines all the variables we want in a multi-line env_vars: variable.
fastfeedback:
    needs: [version]
    uses: coreeng/p2p/.github/workflows/p2p-workflow-fastfeedback.yaml@v1
    secrets:
      env_vars: |
        GLOBAL_SECRET=${{secrets.GLOBAL_SECRET}}
        ENV_SPECIFIC_SECRET=${{secrets.ENV_SPECIFIC_SECRET}}
    with:
      version: ${{ needs.version.outputs.version }}
      working-directory: ./`
The entirety of the env_vars value is treated as a secret, so it will be hidden from any GitHub log output.
Every variable we add like the above will be passed into the execution context of the Makefile.
Updating the Makefile
The above steps have configured the variables and provided their values to the execution of the Makefile. The final step will be using them in our application via configuring them in the Makefile. The Makefile is in the root of the application repo and is the main interface between the P2P pipeline steps and the application code.
The Makefile has separate targets for each stage of the P2P pipeline. In this example we’re going to add variables to the application when running in just the integration environment - but exactly the same steps can be added for other environments (though extended test and prod will require their respective GitHub worfkflows to be amended in the previous step).
Variables can be passed into the application via additions like:
--set-literal service.environmentVariables.GLOBAL_VARIABLE="${GLOBAL_VARIABLE}"to the relevant Makefile target. So for a full example that targets the integration environment:
.PHONY: deploy-integration
deploy-integration:  ## Deploy helm chart of the app to integration namespace
    helm upgrade --install $(app_name) helm-charts/app -n $(tenant_name)-integration \
        --set registry=$(REGISTRY)/$(FAST_FEEDBACK_PATH) \
        --set domain=$(BASE_DOMAIN) \
        --set appUrlSuffix="-$(tenant_name)-integration" \
        --set tag=$(image_tag) \
        --set service.image=$(image_name) \
        --set integration.image=$(image_name)-integration \
        --set monitoring=$(MONITORING) \
        --set dashboarding=$(DASHBOARDING) \
        --set tenantName=$(tenant_name) \
        --set appName=$(app_name) \
        --set service.resources.requests.cpu=0m \
        --set-literal service.environmentVariables.GLOBAL_SECRET="${GLOBAL_SECRET}" \
        --set-literal service.environmentVariables.ENV_SPECIFIC_SECRET="${ENV_SPECIFIC_SECRET}" \
        --atomic
    helm list -n $(tenant_name)-integration ## list installed charts in the given tenant namespace
The application’s Kubernetes deployment manifest then needs to take care of supplying everything that is in .Values.service.environmentVariables as an actual environment variable - this is already done in our reference applications - and is covered in more detail above.
Validating the application has the expected variables
To validate all of the above has worked correctly, after the application is deployed to the relevant environment you can connect with corectl env connect <environment> and then run something like:
kubectl get pods -n <namespace>To get a running pod, and then:
kubectl exec -it <pod-name> -n <namespace> -- envTo print out the environment.