Subsections of How-Tos
Autoscale cluster
Warning
Cluster autoscaling will not work unless resource requests for your workloads are defined. See setting resource requests.
Note
Nodes typically take up to 80 to 120 seconds to boot. If this is too long for you, see overprovisioning.
Enable Autoscaling
Autoscaling can be enabled using the config.yaml file. See cluster autoscaling for more details of how autoscaling works.
cluster:
  gcp:
    autoscaling:
      cpuCores: 60
      memoryGb: 200
      profile: "OPTIMIZE_UTILIZATION"
Disable Autoscaling
Simply remove autoscaling block from config.yaml
Before
cluster:
  gcp:
    autoscaling:
      cpuCores: 20
      memoryGb: 80
      profile: "OPTIMIZE_UTILIZATION"
    additionalNodePools:
      - name: "4-pool"
        diskType: "pd-standard"
        machineType: "e2-standard-4"
        minCount: 0
        maxCount: 5
After
cluster:
  gcp:
    additionalNodePools:
      - name: "4-pool"
        diskType: "pd-standard"
        machineType: "e2-standard-4"
        minCount: 0
        maxCount: 5
Custom Node Pools
Define node pool with machine type g2-standard-4 and disk type pd-extreme that autoscales from 0 to 5 nodes.
cluster:
  gcp:
    additionalNodePools:
      - name: "gpu-pool"
        machineType: "g2-standard-4"
        diskType: pd-extreme
        minCount: 0
        maxCount: 5
        labels:
          e2: "true"
Enable Spot Instances
Warning
Spot instances are not recommended for running workloads that are not fault tolerant.
Note
Spot works well if you need to cut down costs for your clusters. See minimising costs.
Cluster setup with minimal costs
Create a cluster with Spot instances, HDD disk and e2-medium disk type.
cluster:
  gcp:
    additionalNodePools:
      - name: "spot-pool"
        machineType: "e2-medium"
        diskType: "pd-standard"
        minCount: 0
        maxCount: 5
        spot: true

# Nodepool with 5 VMs using standard will cost $162 per month

# Nodepool with 5 VMs using spot nodes will cost $61 per month
Exclude Logs
Log exclusions
To change log retention or set up exclusion filters configure in your config.yaml:
platformLogging:
  logRetentionDays: 10
  exclusionFilters:
  - name: my-exclusion
    description: Excludes info messages from my-container
    filter: resource.labels.container_name = my-container AND severity = Info
Exclusion filters use the Logging query language
Note
Log entries are excluded after they are received by the Logging API. The number of API calls is not reduced by excluding log entries.
Overprovision Pods
Note
Overprovisioning works well if workloads need to be provisioned immediately. See why you need overprovisioning.
Overprovision Pods
Create 5 pause pods that will request 1 CPU and 200Mi of memory. In total it will reserve 5 CPU and 1Gi of memory
cluster:
  overprovisioning:
    replicas: 5
    cpu: "1"
    memory: "200Mi"
Setup Alerts
Note
Alerts on key metrics can be useful to reduce your time to detection of issues. See Platform Monitoring for what type of dashboards and metrics are available on the platform.
Alert notifications
To send alerts to a dedicated slack channel, configure a slack webhook in your config.yaml:
platform_monitoring:
  slack_alert_webhook: https://hooks.slack.com/services/T00000000/B00000000/XXXXXXXXXXXXXXXXXXXXXXXX
Access the Traefik Dashboard
You can use the Traefik Dashboard to review e.g. the configuration of HTTP middleware in the platform.
It is located at https://traefik-dashboard.{{ internalServices.domain }}/dashboard/
Sync ArgoCD App
You can use ArgoCD UI to trigger sync for ArgoCD Application.
ArgoCD UI is located at https://argocd.{{ internalServices.domain }}
Since tenant resources are provisioned as parts of ArgoCD Application, it might help you to fix issues related to tenancy.
Here are the steps:
- Login as
adminuser- To get the password run:
kubectl -n argocd get secret argocd-initial-admin-secret -o json | jq .data.password -r | base64 -D
- To get the password run:
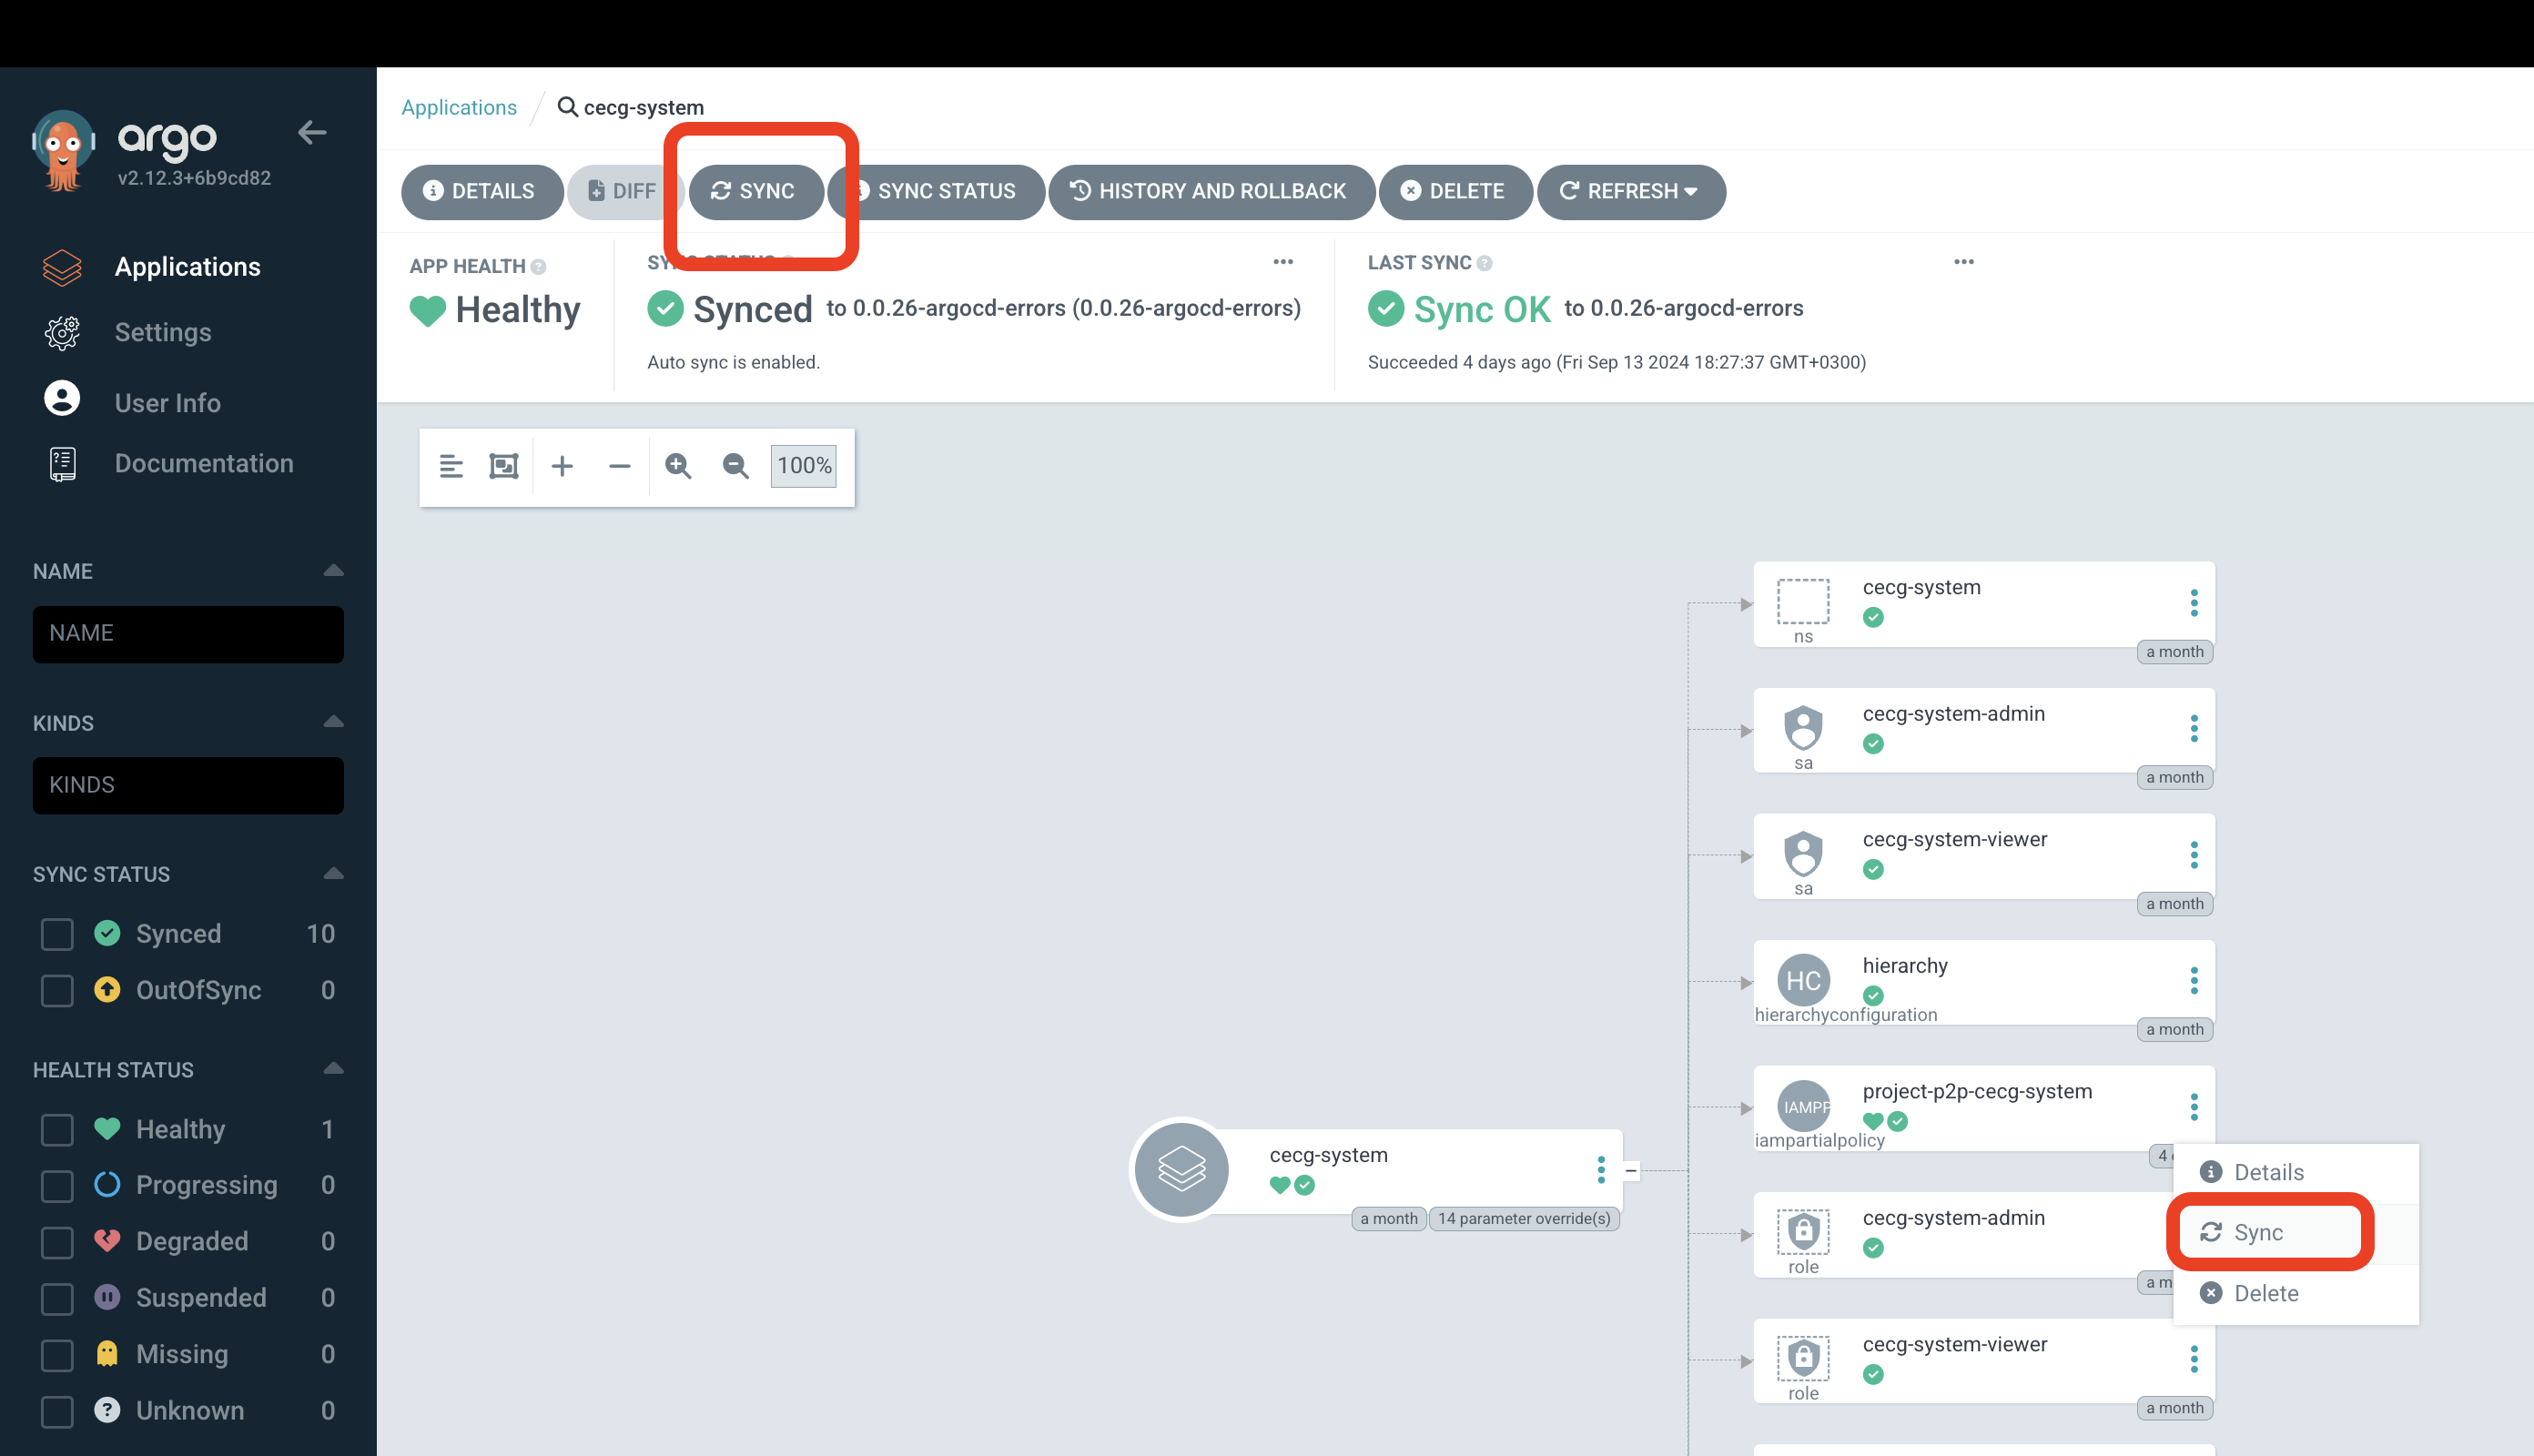
- Pick an ArgoCD Application you want to sync:

- You can either sync the whole application or select a specific resource:
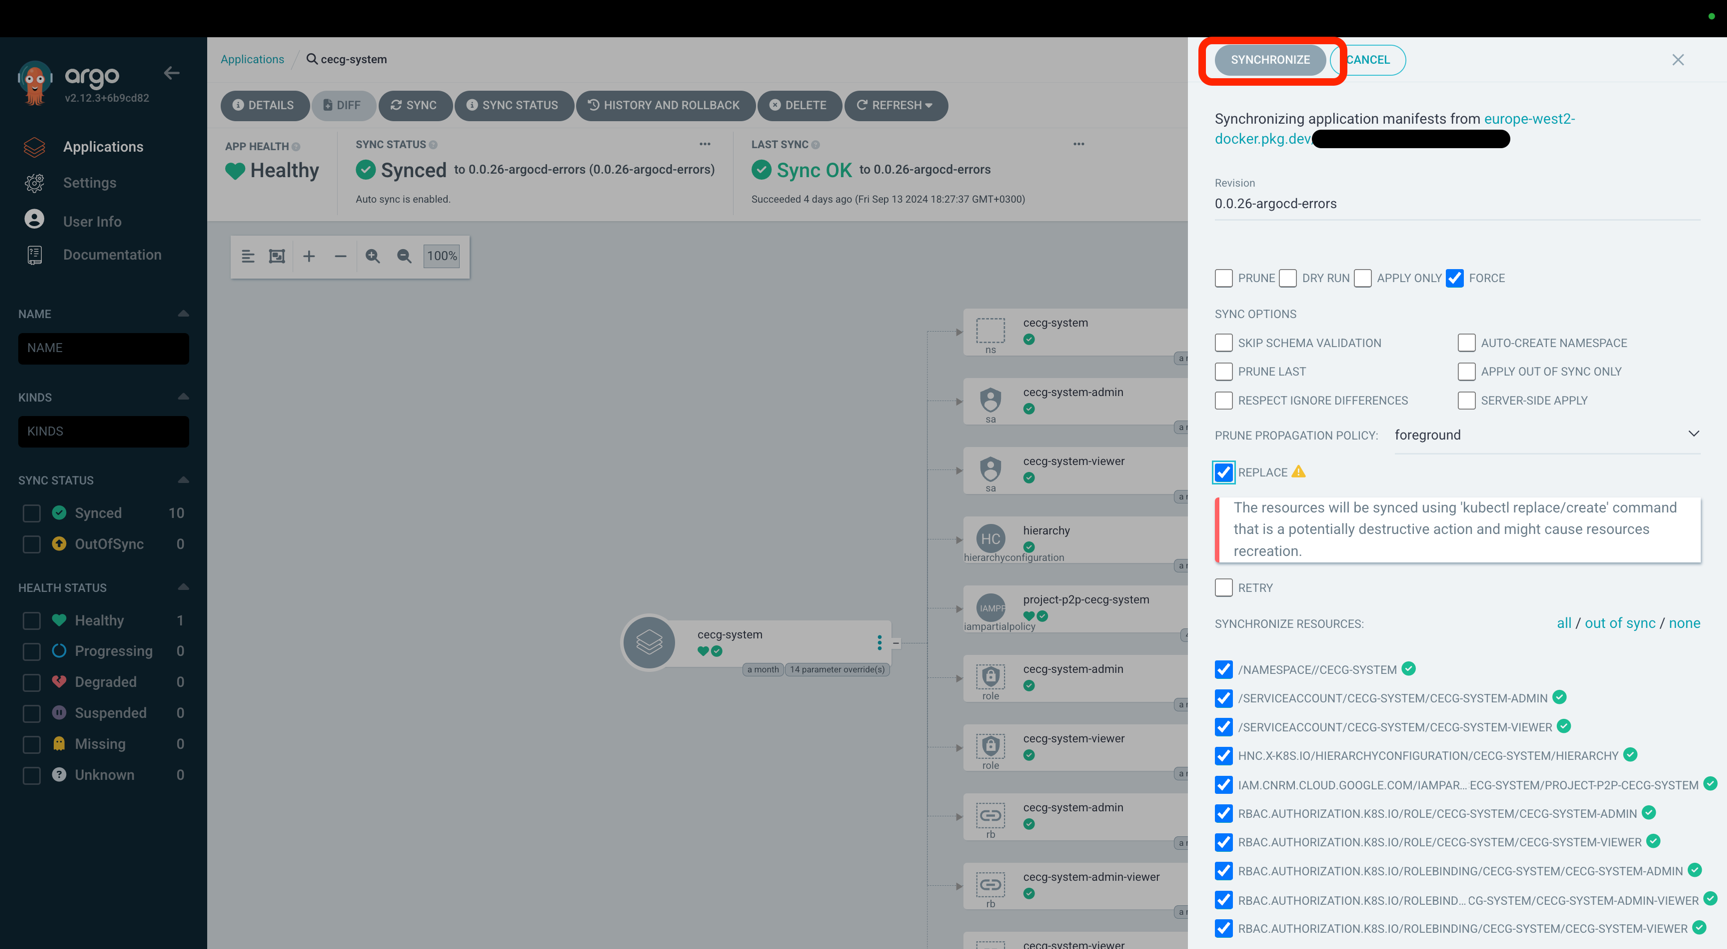
- Select options for sync and click
Synchronizebutton. For example,ForceandReplacewill cause ArgoCD to recreate resources.